-->

Thursday, April 30, 2020

Journal Soup 3 - Pages 2 & 3

Layers, layers, layers and still more layers.  I'm having a great time with the Kate Crane's Journal Soup 3 online workshop.  I find that I'm digging deep to uncover little treasures (aka supplies that I *had* to have but have been untouched for a long time) to use on my pages.

Lesson 2 invited The Muse to create this:


There was a scrap piece of cardboard on my desk and I used that as the base.  Lots of painty layers on here as well as some stamping and scribbles.

Lesson 3 had me painting a focal image on the base piece.  That was outside the ol' comfort zone!


I wonder if this is what retirement will be like.  Will I spend my days happily humming between my studio and my garden?  Sounds nice!

Wishing you happiness and good health...

Wednesday, April 29, 2020

Kate Crane Inspired...Journal Soup 3 #1

Kate Crane's creations always catch my eye.  She usually has lots of layers, happy colors and quirky images.  Of COURSE her creations catch my eye!  I signed up for her Journal Soup 3 online class.  Love it!

Here's my first journal page.  Lots of layers, bright, happy colors AND I combed my Well Said board on Pinterest to find this fun quote.  (I love it when I rummage through that board.  I've found some good stuff.  😀)

The base is a piece of cardboard that would have been headed for the recycling bin.  Lots of goodies used:

  • gesso
  • acrylic paint
  • gel pen
  • archival ink
  • stamps - Carabelle Studios, VLVS, Stampotique, homemade
  • Neocolor Crayons
  • Pencil
  • Charcoal pencil
  • Stickles
  • Distress inks and stains
  • Pitt pen
  • Sharpie
  • tissue paper
That was FUN!  These loose-leaf pages won't be stored in at traditional journal but instead will be loose in a box.  Using a throw-away base relieves the stress of 'ruining' a page in a journal.  ❤

Happy Creating!

Sunday, April 26, 2020

The 100 Days Project - Days 11-20: Postage Stamps

I don't want to break my arm by patting myself on the back, but feeling pretty good about myself - haven't missed a day yet!  The theme for Days 11-20 was Postage Stamps.

I thought this would be pretty simple; stamps are fun to use on my ATCs.  HOWEVER there was one little obstacle that didn't occur to me until...well...Day 11.  Postage stamps are small but not THAT small.  They pretty much take up the whole 1"x1" block.  Some days were really a struggle.  I liked it though.  It forced me to get out of a rut and insist on some help from The Muse.

Here we go...

Days 11-20: Postage Stamps glued, weaved, cut up, embellished...

Day 11:  I couldn't just slap the stamp on the background and call it day.  I added some washi tape, patterned paper, ripped book page and gold embossing powder (this ended up being a 'thing' with the postage stamps.  I've rediscovered my embossing powders!).  In retrospect I kind of wish I had nixed the cherries in the corner, but it is part of the GW lore...)

Day 12: I had a mosaic idea in mind for this.  I first laid down some modeling paste and then stuck the cut up bits on top of it while it was wet.  I wanted it to look a little rough and ready.  Added a little color on the dried paste to make it look more...rustic?

Day 13: I had no idea what I was going to do when I sat down at my desk this day.  I dumped out a bunch of stamps and inspiration hit.  Love it when that happens.  Two stamps used on this one. 

Day 14:  Before I lumbered out of bed this day I was laying there thinking about what I could do with a stamp this day.  Wham-o!  I decided it would be fun to weave two stamps together.  (That ended up being quite a task with my pudgy little fingers, but persistence paid off.)

Day 15:  Another "What am I going to do??" day.  Dumped the stamps out to see what would strike my fancy. This stamp was released at the same time as the mosaic Tiffany Lamp one above (Day 12).  Initially I thought 'tea' - hence the lace and button. I envisioned Paul Hollywood and Mary Berry sipping some Earl Grey while noshing on freshly baked scones. A little research enlightened me that this was indeed a coffee pot.  That's okay...still works.  


Day 16: Happy Earth Day!  I saw this stamp on Day 11 and was eagerly awaiting this day so I could use it.  There were several different manifestations of this inchie before I arrived at this one.


Day 17: This stamp kept catching my eye; it was inevitable that I would use it somehow.  After trimming it to fit a 1"x1" square I dug in my stash for colored bits that matched the butterfly's colors.  I haven't dug into my bead box in years - cool to rediscover my seed bead stash.  The number is washi tape. 


Day 18: Every day after I dumped my stamps onto the desk to see which one I'd use this stamp would catch my eye.  I kept thinking to myself that I should save it and not 'waste' it on such a small project. But no, The Muse just wasn't sure what she wanted to do with it yet.  She knew this day though.  Finding a teeny little face to perch atop the body was a bit of a task...


Day 18:  Lots of ideas floating around in the ol' noggin this morning.  I ended up using two stamps (background strips and birds) as well as some random scraps of book page.  It's hard to see from this angle, but the birds are raised off the base of the inchie using multiple layers of cardstock.

Day 20: This seems to be a theme, but I had no clue what to do this day. I dumped out the prepared stamps in my mini stash on the desk..nothing.  I ended up digging through the unprepped stash and after seeing a bunch of stamps with faces on them the idea for this emerged.

And that's that for the second batch of inchies.  One thing I love about these types of challenges - the kind that goes for an extended period of time - is that it really starts the creative juices flowing.  Nine times out of ten it also leads to me digging through my stash to use things that have just been sitting around neglected.

How is your creativity exerting itself these days?  I'd love to hear about it!

Monday, April 20, 2020

My Little Book of Affirmations

So much free time on my hands allows me to go down the rabbit hole of places like Instagram.  It was here that I discovered consie_atopserenityhill/ .  She has been having 'creative playdates' during the pandemic and I snuck in to play at one of them.  I ended up with this.


The process of making this was very freeing and no-pressure.  We started with plain old printer paper.  It's not intended to be an amazing masterpiece but rather an exercise in just going with flow and creating.  I loved making it.


You can see that the paper is bit wonky and wrinkly and that's all good.  (I have to admit that I went back after taking the picture and glued the middle pages together.)


We started by folding the paper into sections that would eventually become the pages.  Then we drew a random shape on each page and added collage-y bits.


After that I put down some watercolor, watercolor pencil, and watercolor crayon.


Random marks with watercolor pencils and watercolor crayons came next.


Acrylic paint and flowers drawn with Sharpies followed as did still more random marks.

 I finished by pulling out some old sentiment stickers and dying some seam binding with Distress Sprays.

I loved using bits and pieces in my stash that I wouldn't normally reach for.  I also really enjoyed that it was truly about the process of playing around and the end product wasn't the goal.

What has your Muse been calling you to do lately?

Thursday, April 16, 2020

The 100 Days Project - Days 1-10: Masterboards

For the past several years I've stalked artsy friends on social media who participate in the annual The 100 Day Project.  Every year I'm a little envious because they say that it really helps them develop new skills and perspective.  I decided that this year, since I have a lot more time on my hands than I usually do at this time of year, I would hop aboard this particular bandwagon.

My goal is to create 100 inchies.  I like to work small, but rarely work THAT small.  It seems like a do-able challenge though.  Each 10-day increment I'm going to have a different theme.  For Days 1-10 I used inchies cut from index cards.


To start, I gelli-printed up some index cards using cool colors and warm colors.


Then I cut one warm color card and one cool color card into 1" squares.


I alternated between the warm and cool inchies each day.  Here's what I came up with...

Day 1: acrylic paint and Sharpie
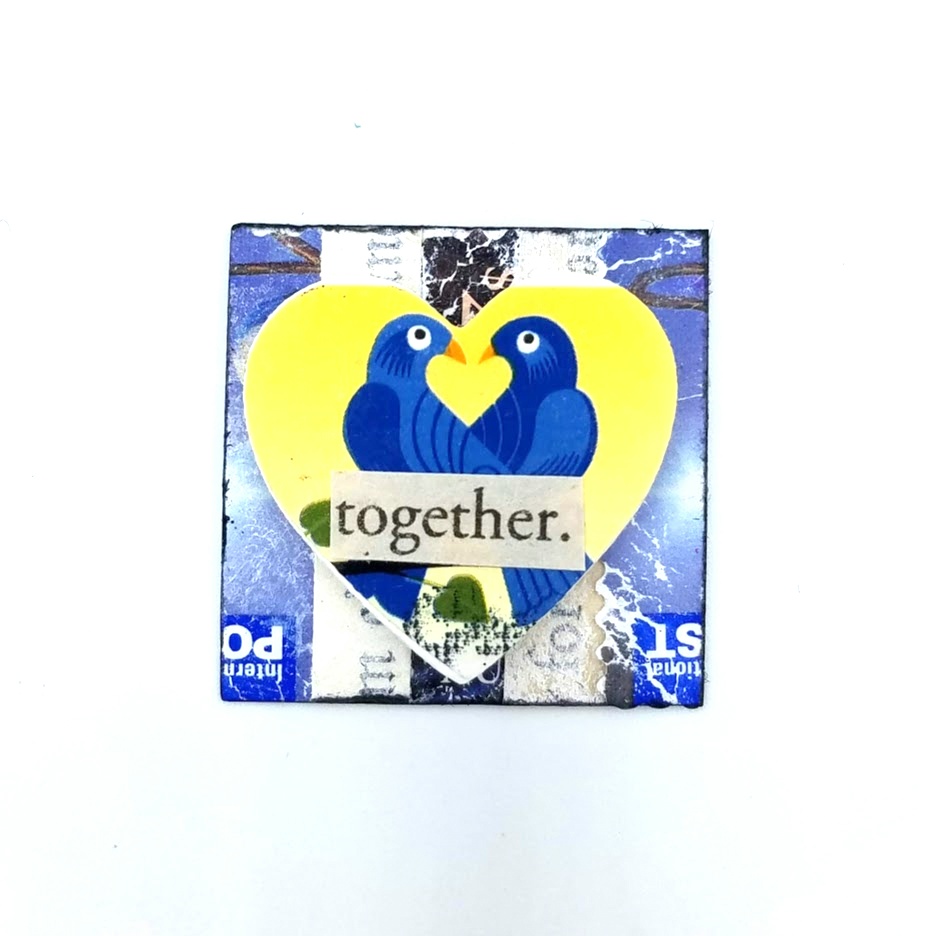
Day 2: text from book, Pitt pen, gel pen, Sharpie.  This was the day that the Superintendent of Schools announced that schools would not open again this year.  My son is a senior in high school  So sad for him and classmates that this is the way they're ending they're K-12 years. No spring sports, no prom, no "lasts" with their classmates, no graduation ceremony...
Day 3: gel pen, Pitt pen, Sharpie, Copics, pencil. It was a beautiful, sunny day and I spent most of it working in the yard.
Day 4: I used both warm and cool colored squares and cut holes in them (making them larger on each square. In addition to an X-acto knife I used Sharpie and dye ink.
Day 5: I drew her majesty using Sharpie, metallic pen, gel pen and acrylic paint. She came about after I found a piece of paper buried on my desk that shows how Teesha Moore makes some of her people.
Day 6: Japanese book page, circle punch, Sharpie, alcohol inks, washi tape, dragonfly brad.  I was perusing inchies on Pinterest and wanted to create something with more embellishment.  Found the little dragonfly brad in my stash in a long-neglected drawer.
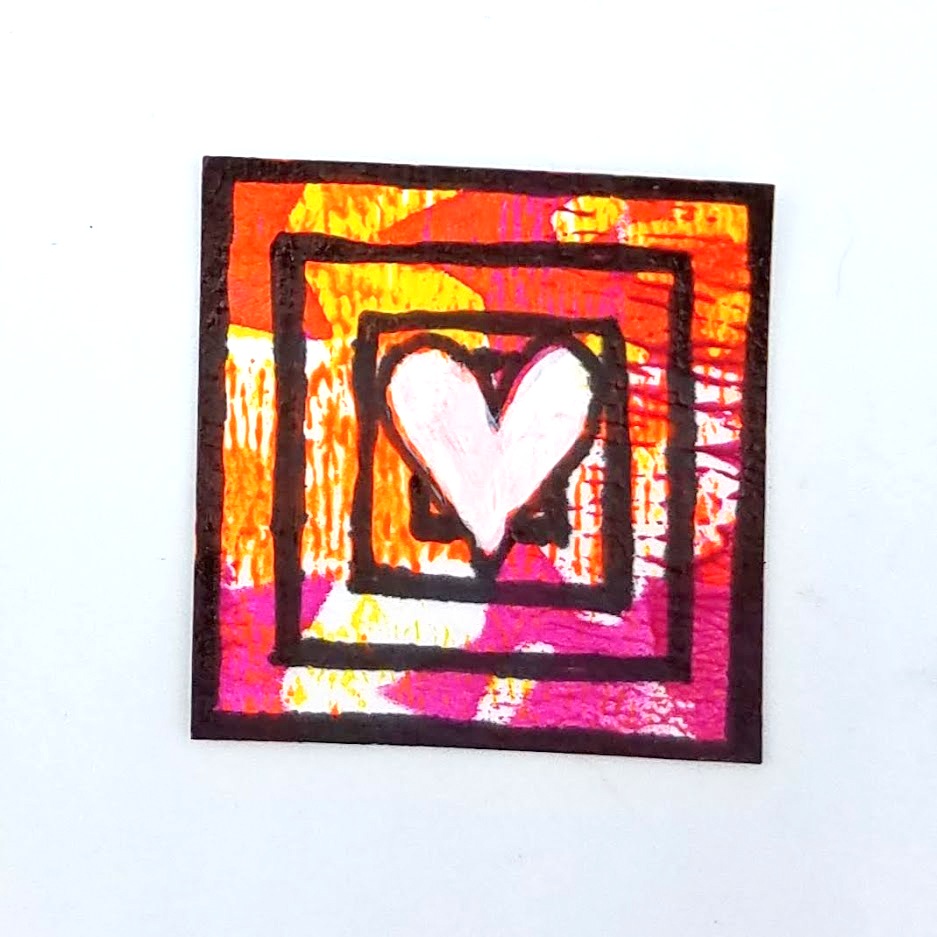
Day 7: watercolor crayon, Copics, Sharpie, gold metallic pen, book texts.  This square had just the one plus sign on it.  The day before was Easter so that must have influenced my choice?  The warm color of the background reminded me of the Southwest and The Muse insisted on an old adobe church.
Day 8:  Acrylic paint, Pitt pen, Sharpie, book text.  The blue of the iris is the only part you can see from the original square.  I just wanted to do something different this day.
Day 9:  music sheet, washi tape, acrylics, Liquid Pearls, Sharpie.  In my inchie research I kept coming across inchies by Phizzychick..  This was inspired by some of her work.

Day 10: Acrylic paint, Sharpies, watercolor crayons, glitter spray.  I wanted to use complementary colors today.  The circles reminded me of bubbles and I cut the fish from one of the warm color squares. 
And that's it...days 1-10...check!  The first four days I found it easy to sit down and create something.  Then it started getting harder and I had to slog through a bit.  I found myself looking at my plan and hoping for a new theme.  I stayed motivated though.  But we're only on Day 10...yikes.

Here's how I'm keeping myself honest.

The Grand Plan
If you'd like to follow along daily check out my 100 Day Project instagram account @jjjhere100dayproject.

Thanks for hanging in there for this very long post.  Cheers!

Saturday, April 11, 2020

Interactive Door ATC

The weather here has been fabulous!  It makes it a little harder to sit in the studio and chill - I prefer to soak up all of those gorgeous golden rays when they make an appearance.

Swap duties do call though.  This latest ATC is for a swap that requires an interactive door element.  I love, love, love this door from Stampotique; haven't used it in eons though. 

Technically it's a little high.  An ATC is supposed to be 2.5" x 3.5" (which my layer underneath is).  I just didn't have the heart to chop it off though.

Here's a glimpse...


And another...


What?!  Bet you didn't know there'd be a llama in there.  The person I'm sending this to really loves llamas.  The framed artwork behind my furry friend is from the Peruvian artist, Leonardo Asiro.

That's it for today, folks.  The sun is out and the backyard is calling...

Sunday, April 5, 2020

Favorite Quote...SDC #345

Hello, Peeps!  Yesterday I had a good ol' time celebrating my son's birthday.  It was quite different from what we had originally planned and it ended up being just fine.  A good time had by all...

I got back to 'work' (ha-ha...arting isn't work!) this morning in my little pandemic mini journal.  (I don't know that the name will stick, but for now it really is kind of a chronicle of what I'm thinking as we all go through this.)


The inspiration for this page was the Stampotique Designers Challenge for this fortnight: Favorite Quote.  I do love this one...it applies in so many situations - the current one for sure.  I don't know about you, but I'm constantly shaking my head in dismay when listening to the news or hearing about people ignoring the guidelines designed to keep us all safe.  Ai yai yai...

Be safe, stay sane, wishing you good health,
Julie

Saturday, April 4, 2020

Happy 21st Birthday!!

Good morning, my friends!  Yep.  Today my middlest child turns 21.  I am sure that this evening is not going to go as he thought it would a month ago.  It was very sweet actually.  He said he wanted to go out with his older sister, his dad and I on his actual birthday.  He was very excited about getting carded.  Of course that's not happening amid the Covid-19 madness.  Instead, we'll be travelling from the kitchen, to the living room, to the family room.  (I must remember to ask for his ID at each stop!).

Of course there's still a birthday card involved.  I love making these interactive cards even though this style always takes me longer than I think it will.  This one was particularly difficult - the Muse wasn't cooperating. But here goes...the birthday card for Devon (aka Devon, Devon, Little Slice O' Heaven)...


Sip, Sip, Hooray!  Happy April 4th, y'all!


Thursday, April 2, 2020

Rain + Rainbows ATC

Hello, my friends!  I hope this finds you well.  I signed up for a few more ATC trades.  This one is for a rainbow-themed swap.


Don't you love those water droplets?  This stamp sat neglected in my stash for a long time.  So happy to have rediscovered it.

The colored strips are ripped bits of gelli printed tissue paper.  The cool thing about using tissue paper like this is that it is a smidge translucent.  I love that I'm able to dig through my stash and use some of my goodies. up.

Keep on keeping on and thanks for stopping by today!