-->
Showing posts with label 12 tags of 2013. Show all posts

Friday, January 31, 2014

12 Tags of 2013 - September

Procrastinate much?  I'm working on my 'closure issues' and trying to finish up the 12 Tags of 2013.  ;)  As I've mentioned before (and I'm sure you've noticed if you've followed along for any amount of time) that I became addicted to ATCs some time around August.  I completely set aside all of my other little obsessions - cards and tags - and went on an ATC-making binge. While I've thoroughly enjoyed making ATCs, it has been bugging me that I didn't finish out 2013 with the tags.  Here goes...

In September Tim made a beautiful tag using Distress Stains, Distress Paint, embossing paste, stencils, etc.  (See his tags here: http://timholtz.com/12-tags-of-2013-september/)  I borrowed a lot of his ideas for my tag.


Embossing paste through a cityscape stencil

Distress Paints through stencils
I feel like I've lost my tag mojo a bit - something seems to be missing from this - but I'm sure if I keep plugging away at those 2013 tags (only 4 to go!) I'll get it back.

Thanks for stopping by and have a great weekend!

Wednesday, July 31, 2013

12 Tags for 2013 - July

Squeaking in under the wire again this month with my tag for July.  My favorite thing about Tim's tag this month was the brayered background.  (You can see his tag HERE.)
 

 This tag was a bear for me to finish; it just kept needing something more.  I stuck to his brayered background, distressed the edges with Walnut Stain DI and added bits of script stamping and the bird on the branch image.  I wanted Santa to stand out so stamped him in black ink.  Both the ribbon on top and the twine on the bottom were altered using Distress stains.


I attempted his crackle technique for the numbers but used Crackle Accents as that's what I had on hand.  It worked alright but didn't really turn out how I'd hoped.  It's okay, as the master himself says, Embrace Imperfection.  Working on that...


Products Used:
• #8 manila tag
• Distress Stains: Barn Door, Walnut Stain, Tarnished Brash
• Distress Paints: Tarnished Brass, Antiqued Bronze
• Distress Inks: Walnut Stain, Mowed Lawn, Barn Door, Fired Brick
• Dye Inks: Memento Rich Cocoa, Memento Lady Bug, Versafine Black Onyx
• Alcohol Ink: Watermelon
• Dies: Festive Foliage, Doodle Tags
• Other Stuff: Honeycomb embossing folder, seam binding, brads, red tinsel, bakers twine, green glimmer spray, tissue tape

Thanks for stopping by to look at my tag.  Cheers!

Sunday, June 30, 2013

12 Tags of 2013 - June

Schwoo!  Just getting this one in under the wire.  Nothing like waiting until the last minute...

Senor Holtz created a beautiful dragonfly tag this month using watercolor techniques with his Distress Markers.  Sadly, I have nary a one Distress Marker so I improvised with cheapo kiddie watercolors and Distress Inks to create my Coffee Lady tag.  She's popped up in a lot of my creations lately - love her.

I used a waterbrush to do all of the coloring on her. 
 The base image was stamped with Memento Black Tuxedo.  

I thought she needed a little something more after I added the button images.  
Lavendar DMC floss tied in nicely with her robe methinks.

Love this sentiment! I had to do this twice.  I learned that the ink smudges a bit when adding water.  Here's my before shot:

 I just flipped it over, applied the background and then stamped the sentiment.

I'm not sure why I thought a wood grain background was the way to go, but it felt right to me.  I wasn't sure if this technique would work but I'm happy with the way it turned out.  


I took Walnut Distress Stain and swiped it across a manila tag from side to side.  On some of my swipes a blotch was left on the edge - not part of the plan.  I turned them into wood knots with a Sharpie; the 'planks' and woodgrain are defined using a Sharpie as well. 


Hope June has been good to you.  Thank you for stopping by!


Tuesday, May 14, 2013

12 Tags of 2013 - May

Greetings!

Today I've got my tag for May.  I borrowed Tim's use of bright color and rub-ons from his tag.  It's funny to me how my original ideas morph into something completely different. I knew I wanted to use my new Movers & Shapers dies (mini clock and camera) so was thinking something vacation-ish.  After I added the cityscape to the bottom 9-11 immediately popped into my head.  I remember watching the events unfolding that morning very pregnant with my youngest (he was born 2 weeks later) and wondering what kind of world I was bringing him into.  All that to say, strange how things morph in the process.  Onto the tag...


I started with the same process Tim did - rubbing on a few rub-ons.  Next I swiped some Distress Stain (Broken China, Barn Door, Peeled Paint, Mowed Lawn and Walnut Stain) on my mat and ran my tag through.  It was a little lighter than I liked so I followed that up with some blending of the same colors in the inks.  Misted a bit of water over that.

The cityscape stencil started with a base of Picket Fence DS sponged on with Walnut Stain over that.  The stamped images were stamped with Versafine ink and, thinking it neeed a little something more, I stamped a little more on the background using bubble wrap and Pumice Stone DI.


The clock is layered with a grungeboard base, cardstock that I attempted to patina-ize with Distress Paints (Salty Ocean, Mowed Lawn, Antiqued Bronze and Tarnished Brass).  (I ended up wiping a little Inca Gold graphite over some parts).  Barn Door DP and Tarnished Brass finished off the outside.  The clock face is cardstock that I crinkled and distress with Walnut Stain.  A layer of Crackle Accents with more Walnut Stain DI rubbed over it finished that off.  The agony of waiting for that stuff to dry!  Yowza...


The ribbon is dyed with Pumice Stone DI and Walnut Ink DI.  I was thinking a smoky color for this.

And that's my tag.  Thanks for stopping by!


Saturday, April 13, 2013

12 Tags of 2013 - April

Good morning!

Today's little project was my April tag for Tim Holtz's 12 Tags of 2013 challenge.  On his blog, Tim showed a really cool technique for getting a faux patina.  (Follow the link to see his amazing tag.)  He used his new Distress Paints to get an aged patina look but sadly, (and it feels like I say this every month) I didn't have the paints he used so I improvised. 


I attempted a rusted iron look.  To do this I spread some Wild Honey and Tarnished Brass Distress Stains on my craft sheet, sprayed with a little water and ran a piece of white cardstock through it a few times.  After it dried I rubbed on some Wild Honey and Walnut Stain DI.  After roughing up the edges I dabbed on some Walnut Stain and Tarnished Brass Distress Stains on the exposed edges then dipped them in water to make them run into the tag.

The leaves were hand-drawn on the tag and painted with a water brush using Mowed Lawn and Peeled Paint DI.  More were drawn onto a book page that had been swabbed with some Mowed Lawn Distress Paint and a quick spray of Dylusions Cut Grass.  A little Walnut Stain and Peeled Paint DI darkened them up a bit.

Love this water drips stamp in the background.  After I stamped it with Versafine Black Onyx I used my water brush to lighten up the insides of the drops, then I covered them with Diamond Glaze. 

The ribbon was colored with a mix of Wild Honey, Peeled Paint and Mowed Lawn Distress Stains.

The size of the tag is 6' x 3"; I think I'll use it for a bookmark.

Thanks for stopping by and getting to the end of this long-winded description!  ;)

Sunday, March 17, 2013

12 Tags of 2013 - March

Happy St. Patrick's Day!

For my tag this month I opted to go with an Irish theme rather than Tim's Easter theme. 


The tag base is a #8 manila tag colored with Distress Paints (love these!) and Dylusions ink with a bit of Walnut DI around the edges.  Other additions are the fence die (Alterations), tissue tape and house stamps.


I used Picket Fence Distress Paint to cover the metal wing and make it look more angelic.


I also followed Tim's example for making the cut out with tinsel underneath though I used Spellbinders and Sizzix dies.  The ribbon is colored with Broken China Stain and a smidge of Walnut Ink.

Here's the whole blessing:

"May you always walk in sunshine,
May you never want for more,
May Irish angels rest their wings,
Right beside your door."

Check here for Tim's tag and instructions.

Thanks for stopping by.  May the luck of the Irish be with you today!


Sunday, February 17, 2013

12 Tags of 2013: February

Making my January tag got me going.  I had to whip up the February tag too.  :)


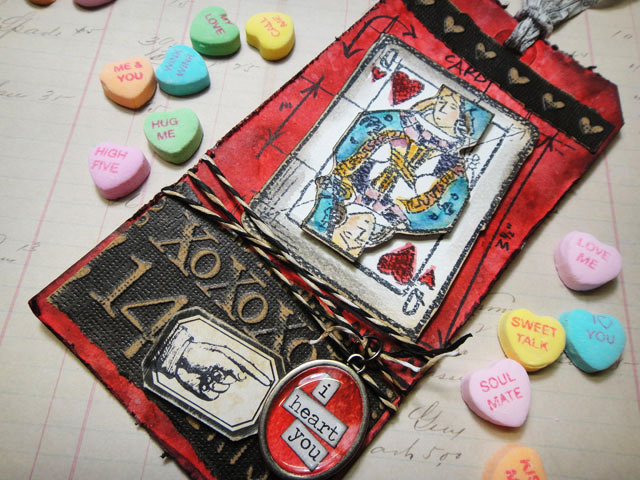
I borrowed a few things from His Royal Tagishnous - color scheme, distressed embossing, tissue tape ribbon, and the Queen of Hearts.

I started with a manilla #8 tag.  My first attempt used Spun Sugar and Barn Door stains for the background.  They blended nicely but the Spun Sugar was too light.  I sprayed Bubblegum Pink Dylusions on top of that with an extra misting of water to blend them and that did the trick.  Added some water drops and then randomly stamped with my heart border stamp (just got that the other day on sale for $2 - woop woop!) in red.  Some torn sheet music and Walnut Ink around the edges finished off the background.


I love these playing card mini embossing folders.  I tried it in red and black cardstocks distressing the raised edges but it wasn't looking like I wanted it to.  Instead I decided to use the faux letterpress technique with Barn Door DI.  Love it! (Technically it's backwards - look at the Q - but I like the areas that are recessed and colored).  The black cardstock attempt is a nice backdrop to make the white card stand out more.

 
Her crown is stamped using Tarnished Brass Distress Stain with some red rhinestones, uh...er...jewels, to finish it off.  The fleur de lis necklace was really a copper color but I used the gold alcohol ink to get it to the right color and strung her necklace with bakers twine.

Last was the sentiment using stamps and Dymo tape and the tissue tape crinkled to look like ribbon.


Here's Tim's masterpiece:


I can't tell you how many times I've eyeballed the new mini blueprint stamps - on the top of my Wish List for sure - but I think my mini embossing folder filled in pretty well in the mean time.

Thanks for stopping by.  Happy February!


12 Tags of 2013: January

Yep.  Procrastinating again.  I just got around to Tim Holtz's January tag this morning.  Yesterday I mozied on down to my local scrapbook store (heretofor refered to as LSS per scrapbooking parlance) yesterday afternoon to pick up my new post-CHA goodies.  I finally grabbed some Dylusions stamps (only sentiments this time but I've got my eye on some of those delish images) and a few bottles of the new Distress Paint as well.  None of this stuff was used on my tag, but it did get me to the crafting table to make this:

 
In typical attic elfish style my tag looks nothing like his so let me help you with the similarities.
 
I started with a #8 manila tag which I ran through the Big Shot with a honeycomb embossing folder.
Inked it up with some Wild Honey, Peeled Paint and Walnut Stain Distress Inks and flicked water about to get some droplet-y looking bits.
 
Instead of the clear film strip he used I put some strips of washi tape on the upper left.
 
No gears but I die-cut lovely butterflies out of some scraps from my mixed media pile.  They had originally been sprayed with Dylusions inks in beautiful bright colors but I toned them down for this by dabbing some Walnut Ink DI over the top.  A bit of Diamond Glaze gives the butterflies' bodies some dimension.
 
 
 My sentiment panel is similar to his but I didn't have the fancy clipboard piece so I just stuck it on there. It was't supposed to be this dark but I accidently smooshed my blending tool on the Walnut Ink pad instead of the Wild Honey one when adding some color.  Oops...those two are most definitely different.
 
I really like crinkling up my ribbon, but true to Tim's example I left it uncrinkled and died it with Peeled Paint stain.  I stamped the 'somethings' from the sentiment (something to do, something to love, something to hope for) on the ribbon with some Fabrico ink that was hiding in the dark recesses of my ink drawer and finished off the tie with a silver key charm which I warmed up with some gold alcohol ink.
 
 
So that's it.  Here is Tim's tag:
 
 
See the similarities now?  I need to figure out what to do with all of these tags I'm making.  Right now they get jammed into a box after I photograph them, but certainly there's some better use I can put them to.  Would love to hear what other 12 Taggers do with their tags once finished.