-->

Sunday, December 30, 2012

Coffee Thank You

As a mom/cheerleader of kids who choose chilly sports (nothing like standing on the sidelines of a soccer field with a strong breeze and slushy rain falling on you OR sitting in an ice rink with concrete benches...brrrr) I fully appreciate the necessity of a little Starbucks run now and again.  I have been the lucky recipient of some gift cards this holiday season so to say thanks I made several of these:


I can almost taste the Cinnamon Dulce right now...

Wednesday, December 26, 2012

SDC 79- Ornaments

Still getting caught up on Christmas...

This little lovely was for the Stampotique Ornaments challenge.  I made similar little box ornaments several years ago for an advent garland (each one has a number on it, 1-25).  Quick and easy to put together.  :)


Since I went into such exhaustive detail in my previous Christmas tag post I won't put my dear readers through that again just yet.  Suffice it to say we've got a couple of strips of cardstock that were cut and scored.  I stamped and colored my ornaments with copics followed by a background stamp of pine cone/needles.  Squirted over the top of the ornaments is some crackle medium (looks pretty cool I think but took SO LONG - an hour or so - to dry for this impatient soul).  I glued the strips into a box shape and interlocked them.  Added a ribbon for hanging and kids, we've got an ornament!


Thanks for stopping by!

A little late, worth the wait?

Good tidings!

We had a very merry Christmas and enjoyed a wonderful time with family.  We are fortunate indeed.

I meant to post this a few days ago, but got caught up in the whirlwind of pre-Christmas festivities. First is a Christmas-y tag.  Inspiration came from the Tissue Tape technique challenge at Studio L3 (there's some washi tape ruffled at the top of the sentiment).

 
Playing with lots of new toys here.  First time breaking out the honeycomb embossing folder - love it.  I started with a #8 manila tag, embossed it, followed by a healthy dose of Peeled Paint Distress Stain (new!) and smidges of Gold metallic Distress Stain.

The reindeer die (new!) was used to cut grungeboard which I stained up with Walnut Stain Distress Stain.  I've had the grungeboard for a while but haven't done much with it.  I really like how leathery it looks.  A dusting of gold Glimmer Mist and shiny mini ornament finished her off.

I cut the fence (new!) from kraft cardstock which was then rubbed with a bit of Walnut Stain Distress Ink and capped off with smatterings of snowy white acrylic paint.  The snow at the bottom is a piece of white cardstock covered with white Crackle Paint.  After it dried I rubbed Tumbled Glass Distress Ink over the paint and then stamped little snowflakes over the top with the same ink.


The sentiment was wrinkled up and inked with Walnut Stain Distress Ink then sprayed with a bit of gold Glimmer Mist.  Getting the washi tape ruffle was a little tricky.  I eventually ATG'd the back of the sentiment strip and ruffled it, right side up, to that before adhering to the tag.  A smidge of gold Distress Stain garnishes the top of the ruffle.  The star was originally a silver, but I used gold Alcohol Ink to color it.  The ribbons were stained with Broken China Distress Stain and a Walnut Stain/Gold Distress Stain combo.

Schwoo...long post.  Now you know more than you ever wanted to know about this tag.  (wink, wink)  I hope you were able to enjoy yesterday with family and/or friends.  Cheers!

Tuesday, December 18, 2012

Hearts for Newtown

I can't stop thinking about the community of Newtown, CT and how difficult it must be for its families, neighbors, co-workers and emergency workers who are dealing with the sudden loss of so many lives.  So very, very sad and a terrible realization that it could have happened anywhere and was so random.  My heart goes out to them. 

A friend sent me an e-mail the other day about Hearts for Newtown.  They are asking people to send in paper hearts with messages of love and support which will be placed around Newtown.  The hope is that the community will feel the love and support from the worldwide community as they pick up the pieces.  More info can be found here.


Peace.

Wednesday, December 12, 2012

12 Tags of 2012 - December

Since I had good ol' Noelle (previous post) out anyway I got down to business on my December tag.


Starting with a white tag I followed TH's instructions to mix some a regular ol' Distress Stain with a metallic distress stain; I chose walnut ink (because I am apparently genetically unable to follow his lead to a T - the only other 2 colors I have are orange and blue) & gold metallic stain.  No go.  The walnut was WAY too dark.  Pretty, but dark.  For version 2, I opted for walnut distress ink with the gold metallic stain.  I inked and dried a few more times to get a splotchy, shiny background.  Rubbed a little more walnut ink around the edges and then stamped my tree image with black dye ink. 

Next I scrunched up and stuck on some musical washi tape and stapled on some tinsel-y looking trim.  (Debated inking up the tape, but glad I decided against it.)  I liked his use of a sentiment, but am metallic paper-less so I opted for one of his tags which I scrunched and dabbed with more walnut ink. 


Noelle was stamped with dye ink and colored with Copics a bits of Stickles before I cut her out.  She is lifted off the background with dimensional foam dots.

I initially dyed the ribbon brown and metallic gold - too dark again.  The second version was a mix of Fired Brick and Barn Red inks mixed with a smidge of Walnut ink and gold metallic stain.  A couple of little lightbulbs later and it was a done deal.

These are Tim's tags.  Do you see the resemblance?

 
Click here to get all the info about them.  Ho! Ho! Ho!

Tuesday, December 11, 2012

SDC 77

Someone's feeling a little grinchy...

Admittedly I don't have my usual Christmas spirit this year.  I made this for the Let's Get Sentimental Challenge over on the SDC blog.


Quick and dirty, if you will.  I dusted off the ancient decorative scissors for the trees and blah-blah-blahed them.  The trunks are washi tape and Noelle was fussy-cut and layered over.  Done!

Thanks for peeking.  Time to head off to work!

Monday, December 10, 2012

Brown Paper Packages tied up with String

 Kraft paper is such a nice base for pretty packaging I think.  Tonight I went to a white elephant gift exchange for work.  I wanted to do more than tape up some Christmas wrapping paper so I whipped out the good ol' kraft roll and my Tim Holtz Festive Greenery die.  A few minutes (and a little ink and stickles) later I had a festive-looking package all ready to go. 

 
I followed TH's advice and inked up theneedles before removing them from the sheet - worked great.  This was the first time I used my extended platform (for the border dies).  OMG...I thought I didn't really 'need' one and was making do without but I am SO GLAD I caved and bought one.  It's so much easier to cut things using the decorative strip dies now.  Buy one.  Well worth the $10 investment.
 
A smattering of coloring with copics, distress inks and a smudge of stickles on plain kraft paper really make the needles stand out.  I cut slits in the pine cone to make it 3D-able and I really like the way it turned out.
 
 
In case you were wondering, I came home with a set of coffee mugs.  :)

Tuesday, December 4, 2012

Rip up your phone book!

Tonight I'm going to a meet-up with a bunch of artsy types whom I've never met.  The theme of the meet-up is art journals.  I have no idea what to expect or what to bring but I decided that I'd better get some action started in mine so if I'm put on the spot I have something to show.  Yikes, that's a scary thought to show people in person

Dylusions inks, oh, how I love thee. First I gessoed (can 'gesso' turn into a verb? Let's say yes) my pages.  To keep it off the other pages I've been using an old phone book.  I started to reach for some book pages but changed my mind and tore some strips out of the phone book and glued those bad boys on there.  Next I squirted on a little Bubblegum and Sunshine inks.  Check out how the phone book strips gobbled up the ink - love it.


Wendy Vecchi has come up with some embossing pastes (would love to get my hands on the black!) and that reminded me that I've had some stashed away for years.  I spritzed a little Sunshine ink into the paste and swiped over a brass template in a few spots. 

Not sure what I'm going to do next - probaby some stamping and flicking of paint.  What would YOU do next?

Monday, December 3, 2012

December Daily: Dec 1 & 2

Every couple of years I decide to create a December Daily mini album/journal to document our December adventures.  It's always amazing to me how much I forget until I look back at these little shapshots of time. Each day I try to take at least one photo of something.  Then I write a little something about it.  It might be a snapshot of cookies, one of my kiddos, a favorite decoration - could really be anything.  I meant to get it all set up and ready to go this year, but being the procrastinator extraordinaire that I am, yesterday found me in the studio cutting, inking, etc.   (As luck would have it, I reached into my Christmas stash and pulled out the one I started last year but never finished.  Still have the pictures though so we're all good....)   Here's this year's cover:


To make the mini I took 8 sheets of solid 12"x12" cardstock and scored them down the middle.  Next I cut them in half.  After folding this gave me 32 6"x6" sides to work with.  I like doing it this way in case I want to staple, sew or use brads; that way it won't show on the other side.  When I've got the pages all filled in I'll bind them with a wire binding and add it to the December Daily collection.

In hopes that I'll stay on top of it this year I collected all of my Christmas-y stuff in a a couple of boxes - stamps in one and other embellishments in another.  Since the pages are all cut out and ready to go it should be pretty simple to whip something up.  I'm using the calendar in the background to jot notes about each day so that when I get the photos printed (once a week) I can refer back to it to know why I took that photo.  If I don't get a photo that's okay too.  I can just write about something (or have a family member add their 2 pennies!) - a favorite memory, something one of us said or did, plans we have, whatever strikes my fancy.

Dec 1st and 2nd are ready to go...


Better get off the computer so I can get Dec 3rd done.  Ciao!

Saturday, December 1, 2012

Cards for Grandma

One of my EtsyGreetings Team members shared this post about a family who will likely be celebrating their Grandma's last Christmas this year.  They are hoping to make their grandparent's Christmas a little brighter this year and are asking people to send Christmas cards to them.  Handmade, store-bought, kids' art - it's all welcome.

Read all about it and get the mailing details here.

Share the love this Christmas!

Tuesday, November 27, 2012

What I've been up to

...is really more along the lines of frantically driving kids from place to place with a little crafty time in between.  I suspect this is my future for the next several months at least.  All good though as I have had the chance to make some cards. 

I'm going clean and simple this year in hopes that they might actually get SENT before Christmas.  ;)  I love the details on this stamp.  I only added little smidges of glitter on the pine (spruce?) needle tips.


For the next one I punched a circle on a Post It note to create to mask my moon (or sun?) and then dabbed some blue distress ink around the outside.  (In order to keep from having little square splotches I cut the foam irregularly before putting it on the blending tool.)  Bits of clear glitter accent the tree, snow flurry and ground.


I think I'm going to add these to the Less Is More Glamour & Glitz Challenge.  Here are a few better pics of my ornaments from the other day.  These are such a blast to make.


Is it beginning to look like Christmas where you're at?


Saturday, November 24, 2012

No Black Friday for me

There is no way I would go anywhere near a store or mall yesterday.  I think I used up all of my shopping tendencies in my teens hanging out at the mall.  Yesterday I hid away in my studio inking, tearing, cutting, and gluing...lots of gluing.  Messy, messy, messy...


While I didn't work on what I planned to work on I did have fun whipping up some more ornaments


and since that was so much fun I decided to unscrew the switchplate and decorate that too!


Today I'll be at my son's hockey tournament all day so I hope that little burst of creativity will hold me for a day or so.  :) 

Thursday, November 22, 2012

Blessed

 
I had a smidge of homesickness last night.  Most of my family is gathering at my sister's house in California for Thanksgiving this year.  We were unable to make the trip and for the first time ever in my 48 years I am spending my Thanksgiving without my sisters, parents, nieces or nephews.  I was busily working in the kitchen last night when this occured to me.  I miss the frenetic estrogen-filled atmosphere as vegies are cut, turkeys are basted, potatoes are peeled. 

I am looking forward to a quiet, relaxed day with my little family though and it makes me realize how very fortunate I am to have had all those years where there was the flurry of activity and a house full of laughter, family and friends - tables loaded with good food (my mom and sisters are all amazing cooks), full wine glasses, the works.  And I feel incredibly blessed to have a full fridge and my little helpers who will be busy with me today in the kitchen.

Life is good.  Happy Thanksgiving!

Monday, November 12, 2012

Tim-spiration - November Tag

(I borrowed "Tim-spiration" from May Flaum.  Love that title.)

I know.  I disappeared for a month but now I'm back with a vengeance.  :)

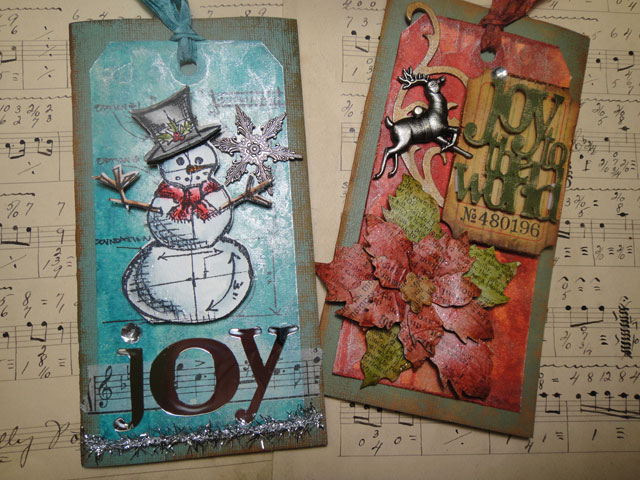
Last night I dabbled in inky deliciousness and completed my 12 Tags for 2012 November tag.  Sitting here pretty pleased with myself, I must say.  I was able to stick pretty closely to the techniques he used. 


A few layers for the background:  Stains (Broken China, Walnut, Peeled Paint), followed by some inking with distress inks and flicking water about, then a background stamp. 

Instead of using a dark ink around the distressed edges I used Broken China Stain.  I love the richness of the color along the edges.


My sentiment is quite small so I didn't have to mask off any bits.  I realized I don't have much in the way of bold prints for my sentiments.  Maybe something I should correct.  (Santa, an addition to the list.  Thanks!)

For the embellishments I dug around in my stash.  I didn't have paper string but I did find some paper wire that I've surely had in my stash for over 10 years - never used.  I obediently inked it up then wrapped it around a paintbrush handle to get some nice curlycues.  Punched out some little pine pieces (branches? needles?) from a Martha Stewart punch that has also been gathering dust for eons.  A little Glossy Accents really makes them look like they've been freshly plucked.  The little jingle bells are colored with some blue alcohol ink (which I've recently rediscovered) and the ribbon is dyed with Peeled Paint and Broken China inks.


I didn't iron the heat embossed trees - no craft-dedicated iron in the house.  Other than that I think I did okay. 

Here's Tim's tag.  Thank you again, Mr. Holtz, for the inspiration and the nudge to get the creative juices going again.


Sunday, November 11, 2012

More Ornaments!

Oh, lookie!  I love these ornaments.  They're so simple, homey and rustic.  I have some old music books that have seen better days so I used their pages as the background for the torn scrap paper hearts.  The raffia bow and inked red ornament toppers are the perfect final touch.


I am so happy with the way these turned out.  I have been wanting to make these for a while and, thanks to rainy Seattle skies and a quiet morning at the homestead, I was able to finish them up.  I've added them to the shop here.

It's beginning to look {a little} like Christmas...

Saturday, November 10, 2012

Pink Christmas

The other day I saw the prettiest light pink Christmas trees made from bottle scrubbers. I think it was the juxtaposition of the utilitarian, industrialish brush with the soft, glittery, girly pink that attracted me.  Generally I'm not much of a pink person, but they would be so unexpected and such a nice switch from the more traditional red and green of the season.  Those pretty trees were in my mind when I started making this ornament.


I started by repeatedly stamping a Christmas text stamp all over pink tissue paper (scavenged from one of my daughter's birthday gifts last June.  My beloved hates that I keep all that stuff, but now I can point to this project and say, "See? I really use it!").  I tore out the tissue paper into random strips and glued it onto a glass ornament.  I layered "Merry" and "Christmas" over white printer paper so it would stand out.  All the other pieces were also drawn/stamped on white printer paper (wanted thin paper so it would adhere nicely to the curved surface of the ornament) and a wee bit of Stickles added to Noelle's hat,  and then glued onto the ornament.  To finish it off I colored the top metal piece with some green alcohol ink.  I'm entering this in the SDC73: Hanging Decorations.


I'm going to dig up some mistletoe and go find my sweetie now...

Sunday, October 28, 2012

Just for Fun

I'm still here, I swear it!  It has been a wonderfully busy month for Elves In The Attic.  I've been up to my elbows in ink, glue, old books, spiders and bats.  No complaints here.  With Halloween just a few days away (and a nice comment from Astrid - thank you!) I headed over to the Stampotique blog to see what the latest challenge is.  A great opportunity to unwrap my new Dylusions Inks couldn't be ignored.  LOVE these inks!  The colors are so incredibly vibrant.  Now I understand what all the buzz has been about. That's what I used for the background color.  Kid you not, this was a white tag to begin with.

ANYWAY, the SDC71 this week is a CASE challenge so I chose to borrow from Astrid herself who made these wonderful ATCs a few days ago.  This one especially caught my eye (I've got a thing for book pages.  Don't know why, but there you have it.)  I really like the look of the black stamped image against that bright green background.  The first one is her's and then the tag I did:


I'm guessing my technique was a little different.  I only have one green ink (so far) so I used a watercolor technique to get the spiderweb in the back (spritzed my stamp with water and stamped over the inked background).  Other than that the similarities are pretty obvious - colors, theme, stamped black image.  Thank you, Astrid!


Thursday, October 4, 2012

This is Halloween!

Visions of goblins, bats, and witches dance through my head.  I've had this song stuck in my head for 3 days.  One of my all-time favorite movies (Danny Elfman AND Tim Burton - genius combination!), I have yet to have my first viewing of Nightmare Before Christmas, but watching this was a nice, quick fix.  :)

Etsy shop news:  My Witch's Spell Book and Potions & Elixirs Textbooks have been quite popular and have been selling as quickly as I can make them.


While I keep telling myself that it's time to pack up the Halloween goodies and pull out Christmas I keep finding new things to add to the shop.  "Just one more..." keeps my desk covered in a plethora of orange, green and black stuff.  I added these Witch's Brew tags the other day.


Okay sing along with me!  "This is Halloween!  This is Halloween! Pumpkins scream in the dead of night...."

Sunday, September 23, 2012

CASual Fridays Fall Fun

Happy Sunday!

The last couple of days have been very fall-like (translate to grey skies and cooler temps for us) but today the sun is peeking out again.  LOVE it!  We've had an amazing stretch of sunny days here in the Seattle area and I've been soaking up all of the sunshine that I possibly can.  I love the crispness to the air that fall brings and I've definitely noticed some leaves changing color.  That's what was on my mind when I created this card for the CASual Fridays Fall Fun challenge this week.


The stamps are from an A*Muse clear stamp set and the patterned paper grass is a scrap I had on hand.  I took some golden-hued cardstock and embossed it with my woodgrain folder and then went over that with some Wild Honey distress stain to make it a bit darker and to highlight the embossing some more.  I think I'm going to send this card to my mamacita tomorrow.  It's been a shamefully long time since I've sent her a card.

Thanks for stopping by.  :)

Saturday, September 22, 2012

Embrace imperfection...yada yada yada...

It was SUCH a great idea in my head.  This week's challenge  is to make party favors.  I have been collecting TP rolls for my preschool class and had a couple sitting on my desk.  The plan was to magically transform one into a witch's broom with little treats inside.  It didn't quite turn into what I envisioned so use your imagination.


I gave the people a greenish tint to make them ghoulish and used a strip of cut-up paper bag for the bristles.  The top is open awaiting some tasty mini candy bars or what have you.
 
Thanks for stopping by!

Tuesday, September 18, 2012

It's a Boy!

It's been a little quiet over yonder.  I've been busy being a taxi driver for my kiddos as our typical fall insanity kicks into gear - soccer, hockey...games, practices...school events...No doubt many of you know the drill.

I've been working on a Halloween mini album, but in the mean time I've decided I'm a little tired of orange and black (say it isn't so!).  Neatening up my studio I found a stamp that I haven't used in ages.  I also discovered the trick to embossing with my woodgrain embossing folder without the paper tearing (Top Tip:  spray with a light mist then emboss).  All of this coupled with me wanting to add a little extra for one of my customers resulted in this little It's a Boy gift tag.


I hope she likes it!

Sunday, September 9, 2012

SDC - Combining Stamps

A quickie post today as I'm having one of those not-enough-hours-in-the-day kind of days.  I made a tag this week for SDC 64: Combining Stamps.


 I stamped Topknot and then cut out her pretty little head.  She's spritzed with a wee bit of Glimmer Mist though it's hard to see and I think the Stickles eyeballs are a nice touch.  It took me a while to come up with some acceptable legs but I found them in the form of a tree. 


The tag started out as plain ol' white which I stamped and embossed with a spiderweb then blended distress inks all over.  A few flicks of water and some walnut ink distress around the edges and there you go.  The quote (or partial quote as the case may be) is from Macbeth I think.  I'm in a spidery Halloween sort of mood these days.  :)


Cheers!

Thursday, September 6, 2012

Halloween goodies and a mini Mini

My work space is a sea of kraft,  black, orange, purple and green I tell ya'.  I've been whipping up lots of little tags and things for Halloween festivities to put in my Etsy shop.  Here are a few I've added over the last week or so:


Taking a break from Halloween yesterday I whipped up this little gem of a library pocket mini album. 


I used to make these in a bigger size and they were really popular with my customers.  Unfortunately the local scrapbook store where I die-cut them went out of business a couple of years ago (SAD day!) and I just didn't have it in me to cut out all those little pockets with scissors.  I recently found a die that works nicely and these are so fun to make that more of these might be popping up in the near future.  Here are some more peeks and you can get more info here in the shop.


Maybe I should make one for Halloween!!